How to Set up an Application User in Azure and Use it in Dynamics 365?
Before we proceed to create an Application User, First let us understand why we require an Application User.
An application user is a user within Dynamics 365 that is tied to an Azure Active Directory Application and performs tasks in Dynamics 365 on behalf of that application.- Application users are used for server-to-server (S2S) authentication to securely communicate with Dynamics 365 with custom applications and services.
- It is in conjunction with Azure Active Directory (Azure AD) that will establish S2S authentication.
- These users do not consume any service licenses.
- It is created with a non-interactive user account, however, it is not counted towards the 5 non-interactive user accounts limit.
- Application users cannot use out-of-the-box (OOB) security roles; a custom role must be made for them.
- Application users do not authenticate with a username and password, they authenticate with a “Client Id” and “Client Secret”.
The purpose of the application users?
- The application user is a built-in user account that is used to perform integration and system back-end service to support a particular feature.
- Since these are built-in user accounts, they can't be updated. The security role that is assigned to these accounts cannot be updated either. This is to prevent any service outages.
- These users do not consume any service licenses.
Let's begin ...
1. log in to: https://portal.azure.com
2. Open Azure Active Directory

3. Open App Registration -> Click on New Registration

4. Set the Name - this will become the name of the user in Dynamics 365.
Leave the Supported account type as Single-tenant (the default value).
Click Register

5. Notice on the left top corner


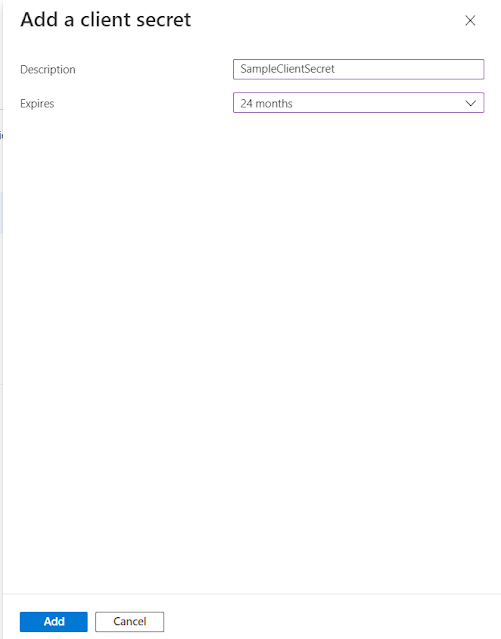
7. Navigate to Certificates & secrets and click New client Secrets, under Client secrets.

8. Enter a description of the client's secret (optional).
Select the expiry date for the client's secret. The maximum you can select is 24 months. After the expiry, a new secret will need to be generated, and any applications using the secret will need to be updated. It’s worth setting a reminder for this, to avoid any service interruptions.
Click Add


10. Navigate to API permissions and select Add permission.

11. From the Request API permissions screen, under Microsoft APIs, select Dynamics CRM.


13. Added successfully

That's all ...
Thank you!!!
Happy Azuring
Happy CRMing...

No comments:
Post a Comment